
Elixir connecting to databases part: 1
Elixir does a great job when coupled with phoenix to give you a seamless setup when connecting to Postgres, but how does it actually work? What if I want to connect to a different type of database, say MongoDB or Dgraph. Well these follow much the same process you just have to do it manually.
How does Elixir connect to a database in the first place?
I’m glad you asked, when you create a new Phoenix project the most useful framework there is for Elixir, it comes bundled with Ecto. The official description is: “A database wrapper and language integrated query for Elixir”, what it actually means is: “The best thing ever”. I’m not joking when I say that Ecto is fantastic, it really takes the headache out of dealing with databases. Not only can it handle SQL databases, it can even handle NoSQL based ones too.
There are four main components in Ecto: Repo, Schema, Changeset and Query. You will use these four a lot in your application.
Ecto.Repo: short for repositories, they’re simply wrappers around the data store. This repo allows us to do all the crud functionality we want, all it needs is an adapter. An adapter is the little piece that talks to the specific database type, so Postgres has postgrex to talk to a Postgres database. A typical setup for postgrex would be something like this.

This is what you're presented with in your “dev.exs” file. This adapter is what allows ecto to communicate directly with Postgres. As you can see it contains the username, password, the name of the database and the pool size. The “pool_size” is simply the maximum amount of connections you want the database to be able to handle.
There are a number of configurations you can add to this to achieve different things.
:name - this is simply the name of the repo’s supervisor process, which is what handles any crashes that need to be restarted.
:priv - the directory where the repo data is to be stored. By default this is set to the folder “priv/YOUR_REPO”, which has to be pointed at a subdirectory.
:url - contains all the information that you don’t want to keep in the project, this can be helpful when you have a public repo on github.
:loggers - this allows you to output tuples from each query run so you can track various things going on in your database.
Ecto.Schema: used to map any data source into an Elixir struct. Typically used for mapping a database table to a struct, this is very similar to a traditional ORM except it actually works and isn’t terrible to work with.
I’ll show you a quick example of how to create a database schema, that you can run to set up your database. Thes are used to create the tables, which directly map to structs so you can easily manipulate your data.
Step 1:

This command creates schemas for you, you specify the folder, I gave it Person, then the file is called “info.ex”, it then creates a table called “person_info” giving it the four fields “first_name”, “last_name”, “gender” and “nickname”. These are the columns for that table.
You run “mix ecto.migrate” to update your database.
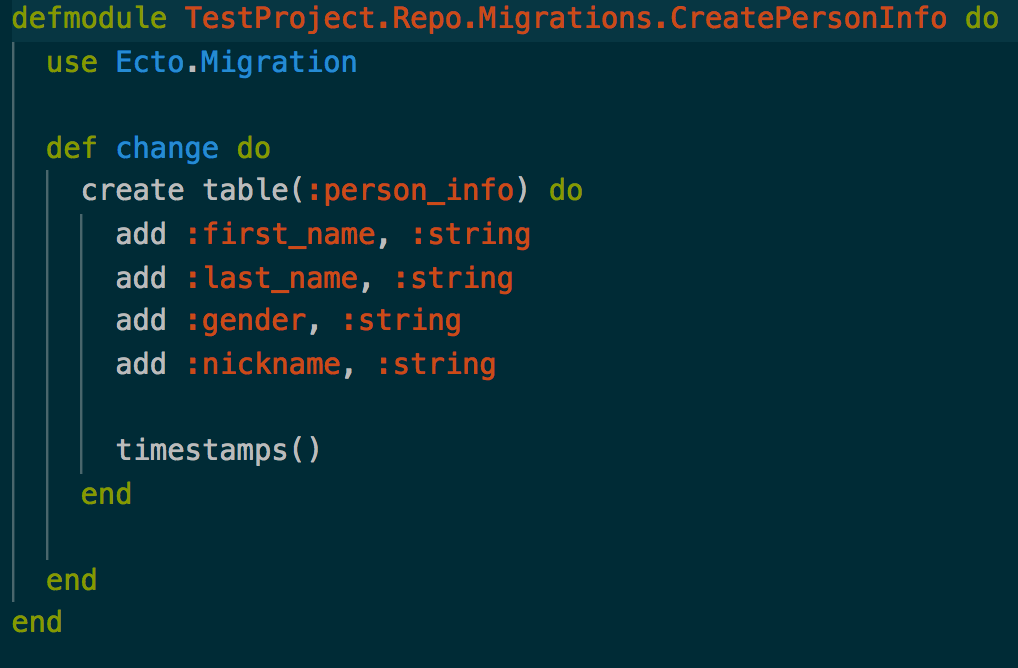
This is the created schema. As you can see it contains all the fields we specified. It also contains an extra field, the timestamps. This field adds two extra fields to the database table: “inserted_at” and “updated_at”, these two fields provide you with some extra information about when the row was inserted and modified.
Ectopic.changeset: changes provide a way to perform validation and filtering to fields before they are inserted into a database. This is where you do all your handy validation, say required field or email validation. This is also where you can do all the associations, there will be more on this in future blogs.

This is the model for that schema we just created. We have to declare the schema again, but in a slightly different way. Then we declare the changeset. The changeset is the bread and butter of Ecto. It’s what maps your database table to a struct. The struct then allows you to manipulate the data much like you would in an OO language.
The changeset works by taking in a “Info” struct, as well as some data to be inserted. It then casts the data passed in to the structure of “Info” mapping each field to the field that the table wants. The “validate_required” simply means that you must provide these fields otherwise the changeset is invalid. There are many things you can add to the changeset, from email validation to many_to_many associations you can do it all through the changeset.
Here's how it works

The info variable is a simple struct that you put all your data into. Then then changeset gets passed in an “Info” struct and the data.

The changeset does all the work of getting it into a valid format for the database. Please note that the data isn’t in the database yet, it’s simply in a form that can be inserted into the database. The changeset is used to do all the validation you require, clean up data and associate it with other tables if need be. As you can see it is a valid changeset, indicated by the boolean “valid?” (Handy tip: variables that are booleans and functions that return booleans will have a ? on them). It shows you all the changes to be made in the changes struct. Lastly, there are no errors.

This is what gets returned when you insert the changeset into the database. You can use Repo.insert, or more formally TestProject.Repo.insert. Where “TestProject” is the name of your project. Success, you have officially inserted your first record.
Ecto.query: the final part of Ecto. These are SQL like queries written in Elixir, they allow you to do any combination of things to be run on the database itself. The best feature is its secure from SQL injection, yet there still composable. Let me tell you they are very powerful.
But how do we use these queries?
Well you create a function or inline a “from()”, like so

This from statement, is for the “Info” struct type, and it selects all the rows that match the first name of “Bill”. Then passes the query to the Repo.all function which does the actual retrieval of data.

This is the returned data, as you can see, it’s inside a list, meaning that it can return multiple rows, each row being returned as an “Info” struct of all the data in the row. Pretty cool ey? These are just the absolute basics of Ecto, it only gets better from here! If your as excited about Elixir and Ecto as I am then join me next week when I take a deeper dive into other areas of Ecto.
This is part one of a series on Ecto, I won’t cover everything about Ecto, but there are some really cool things to learn about it. So stay tuned for part 2
I’m always learning something new and with Pluralsight I can have unlimited access to all things programming. But hold on, it’s not just programming. There’s photoshop, visual communication, manufacturing and design. There's a whole bunch! Sign up today and get a free 10-day trial!